
Build an Interactive Holiday Card with ChatGPT 5.2 (Canvas)

OpenAI introduced GPT-5.2 as its “code red” response to Gemini 3.0, aimed at unlocking more economic value in real workflows, especially where users need the model to write code, build presentations, create spreadsheets, understand long contexts, use tools, and manage complex multi-step projects.
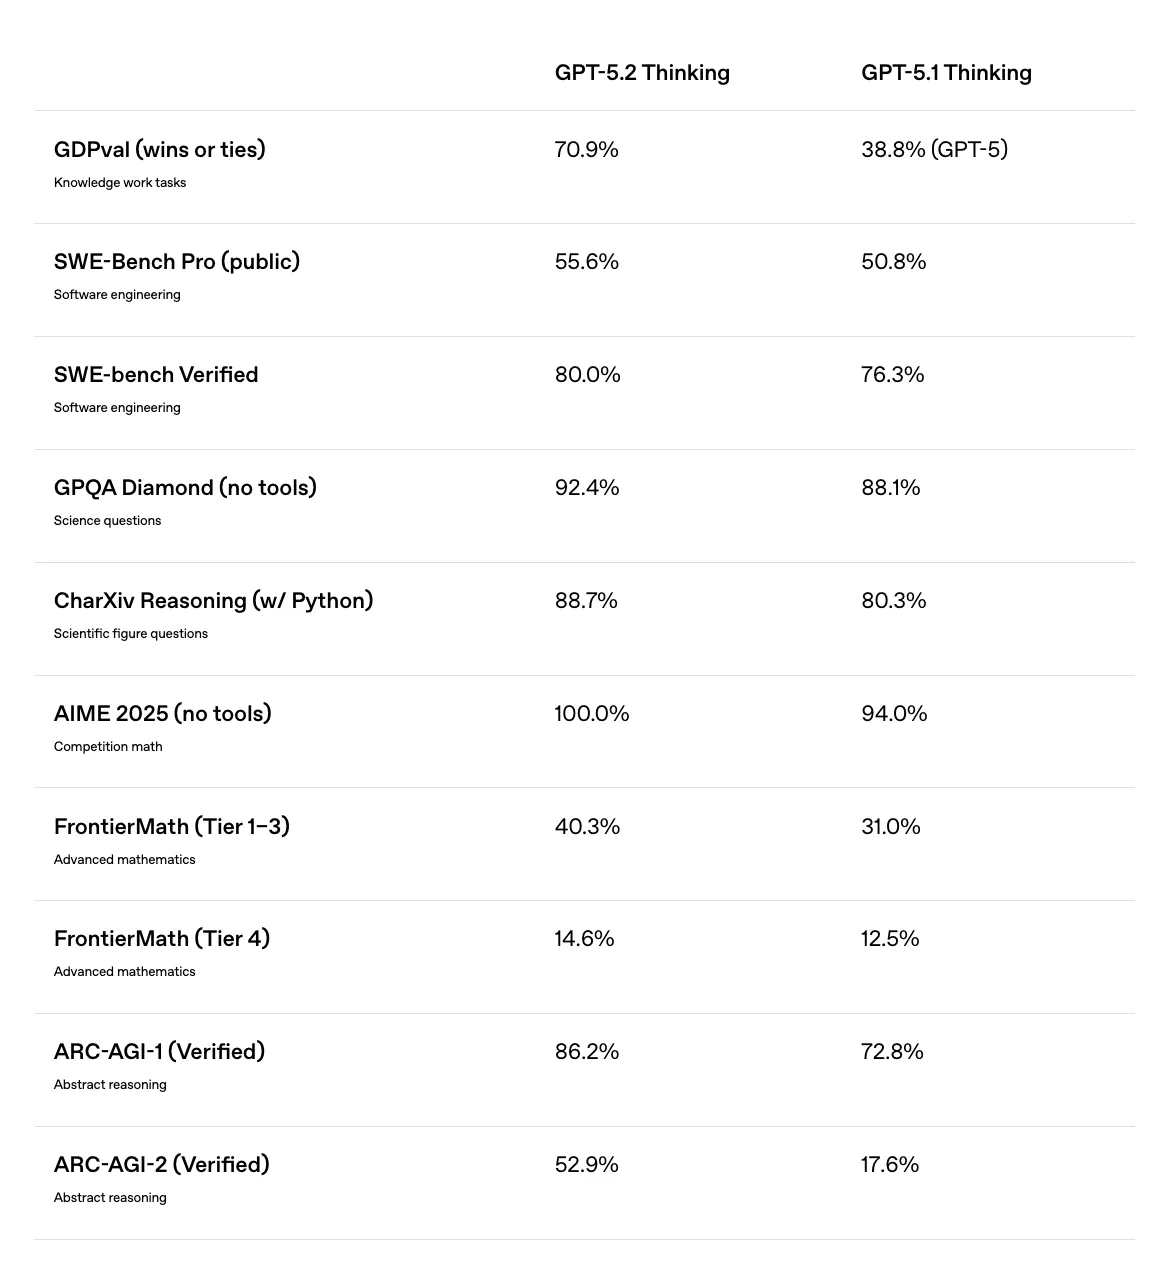
OpenAI also explicitly highlights stronger front-end software engineering in GPT-5.2 compared to GPT-5.1, with early testers describing it as significantly better at handling complex or unconventional UI work. They list a “holiday card builder” as a concrete example of what the model can produce from a single prompt.
Inspired by that example, the walkthrough below shows how to use GPT-5.2 and Canvas to build a simple interactive holiday card, complete with a warm wishes generator and playful on-screen interactions.
Below is a practical walkthrough: creating a playful, interactive holiday card you can share with others.
Step 1: Start in Canvas with the right model
First, make sure you are using ChatGPT 5.2.
- Check the model selector and confirm ChatGPT 5.2 is active.
- In the prompt bar, type /canvas to open a Canvas workspace.
- Paste the prompt below and send it:
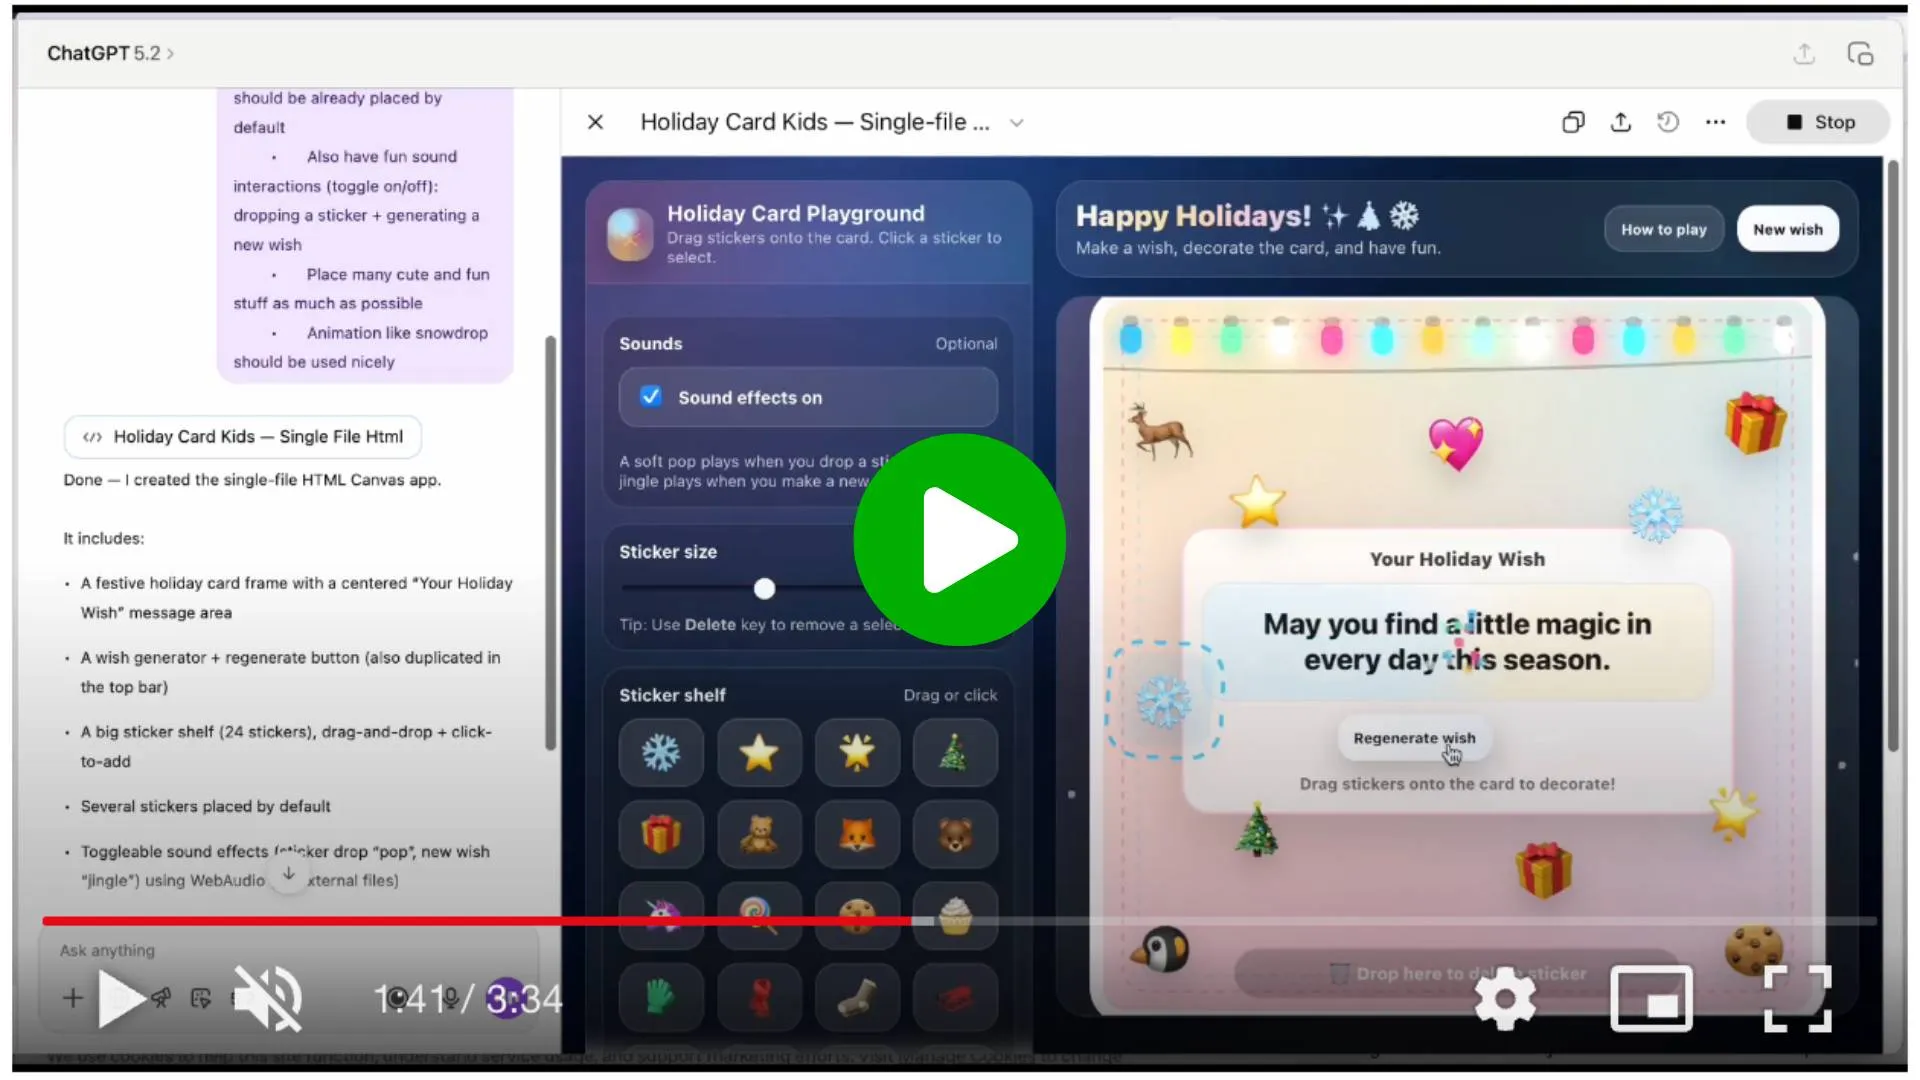
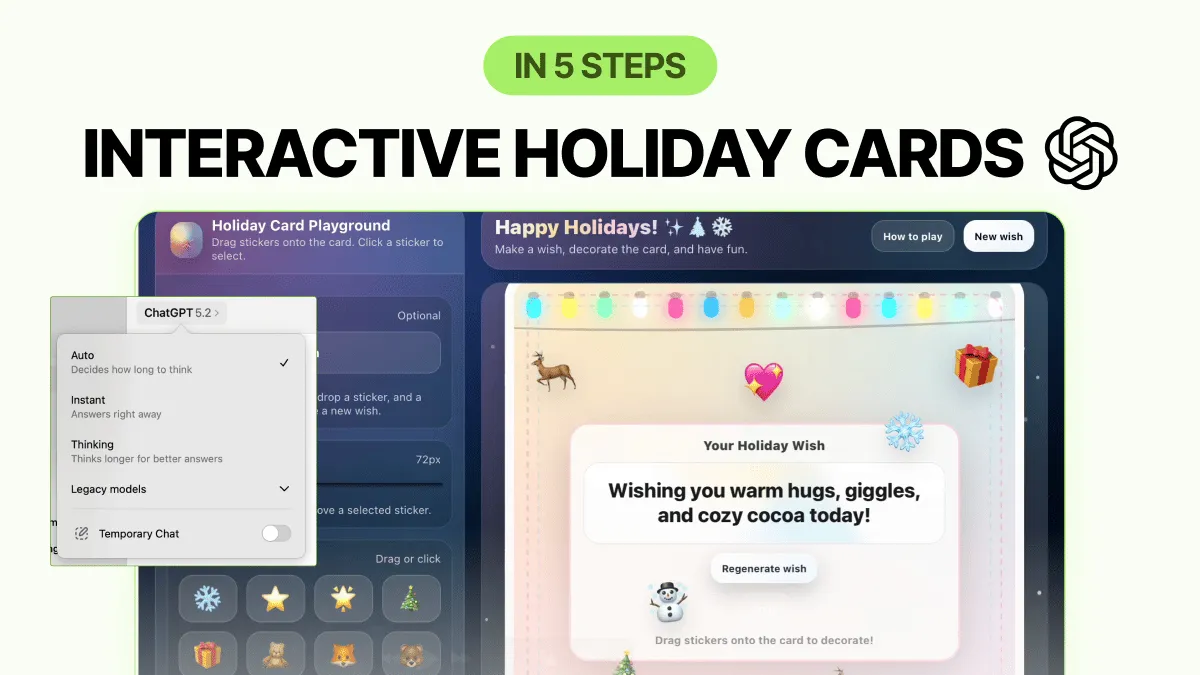
Create a single-page app, in a single HTML file, that demonstrates a warm and fun holiday card! The card should be interactive and enjoyable for kids!
- Have a holiday card frame with a dedicated message area on the card
- Add a wish generator that writes a short, warm, family-safe holiday wish into the message area
- Include a button to regenerate the wish until the user likes it
- Have variety of items kids can drop in the UI; a few should be already placed by default
- Also have fun sound interactions (toggle on/off): dropping a sticker + generating a new wish
- Place many cute and fun stuff as much as possible
- Animation like snowdrop should be used nicely
This prompt is intentionally scoped to front-end only.
Step 2: Preview the card and test core interactions
Canvas will generate a complete HTML file.
- Click Preview to see the card running.
- Test the basics:
- Generate multiple holiday wishes
- Add and move stickers or emojis
- Adjust sticker size or placement
- Toggle sound effects
- Treat this as a real product review: does it feel playful, readable, and intuitive?
At this stage, don’t worry about polish. You’re validating that the interaction model works.
Step 3: Refine the UI using natural language
This is where ChatGPT 5.2 is noticeably better than earlier versions.
Instead of editing code, describe changes in plain language, for example:
- “The Regenerate wish button should be center-aligned with the wish box.”
- “Make the wish area visually stronger on large screens.”
- “Reduce the snow animation slightly so it feels calmer.”
- “The sticker panel should behave like a sidebar on wide screens.”
ChatGPT updates the underlying HTML while preserving functionality.
Step 4: Improve the experience for different screen sizes
Once the card looks good on your screen, push it a bit further.
Ask ChatGPT to:
- Adjust layout for small vs. large screens
- Ensure the wish text remains readable
- Prevent panels or stickers from overlapping the main card area
Example prompt:
“Make sure the holiday card stays centered and readable on both mobile and large desktop screens, with the sticker panel behaving as a side bar on wide layouts.”
This step turns a fun demo into something shareable without embarrassment.
Step 5: Share and reuse the experience
When you’re happy with the result:
- Use the public Canvas link
- Share it with family, friends, or colleagues as a holiday greeting
- Reuse the same structure later for:
- Event cards
- Team shout-outs
- Simple interactive announcements
PRO Members: watch the video tutorial here: In 5 Steps: Build an Interactive Holiday Card with ChatGPT 5.2